I just had a very bad time upgrading my Asus WL-500gP V2 router to the latest version of Tomato. I made the fatal mistake of uploading the wrong firmware because it is NOT CLEARLY DESCRIBED ON THE SITE. Forgive me for being upset, but is it too much to ask for a simple HTML table describing WHICH download to use for my router!? I shouldn’t have to dig so hard for this information… anyhow…
So I ended up bricking my router… yaaaaay. I had that sinking feeling you get when you know you just screwed yourself really bad. Luckily after a few hours of googling and researching I formulated a solution which I am going to share with anyone who wants to read it because this was goddamn ridiculous to figure out:
How to Unbrick Your Asus WL-500gP V2 (Premium) Router after Flashing it with the Wrong Firmware
- Download the correct firmware, which for the Asus WL-500gP V2 (Premium) is the ND version. Get it here. Why this is not clearly labeled I don’t know! And NO it isn’t enough for me to just see that the WL520GU is on the same row and infer that this is the same file that I need for my router. That is called making an assumption which is a foreign concept to me in the world of engineering and computing.
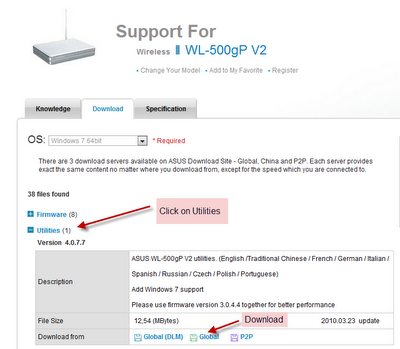
- Download the Asus Utility here: http://support.asus.com/download.aspx?SLanguage=en&m=WL-500gP%20V2&p=11&s=2&os=30&hashedid=jTcQKIRXgNPLo54b

- Install the Asus Utility and ignore the applications that want to launch at the end of the installation. Those aren’t the ones you want to use to fix this problem.

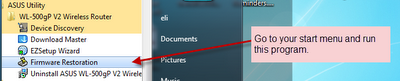
- After the installation you want to run the Firmware Restoration Utility
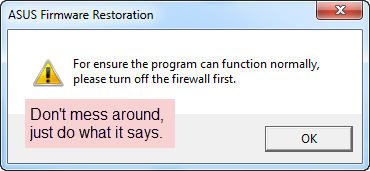
- You will get the following warning, don’t ignore it, you want to disable your windows firewall like it asks you to.
- Now before you continue you need to prep your brick to become a router again. First things first, disconnect everything from it and plug your computer into one of its LAN ports, not the WAN port. For the record I got these instructions from the dd-wrt website here.
- Disconnect the power from your router
- Hold down the black restore button
- Plug it back in while holding down the restore button and don’t let go until the power light starts to flash. It should flash about once a second. If you can’t get your router to do this then it might actually be in worse shape than this tutorial can help you with – sorry 🙁
- At this point the router will keep blinking forever until you turn it off (at least this is what I experienced)
- Change your computer’s IP to 192.168.1.100 (anything but 1)
- Change your Subnet to 255.255.255.0
- Change your Gateway to 192.168.1.1
- Now it is time to cross your fingers
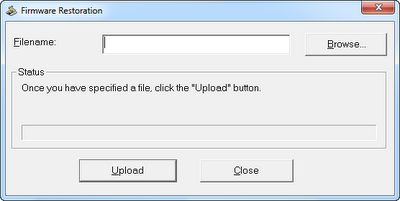
- Select the Tomato ND TRX file
- Press the Upload button and let it do its thing, don’t touch anything, don’t think anything, don’t breath. Just stare at the screen and hope it gets to the screen that says “Successful” or something like that.
- Now if everything went well you aren’t pulling your hair out and you see a “Successful” message of some kind, congrats it uploaded.
- Wait an additional 2 minutes. Get up, make some coffee, drink it, come back. Just wait the damn 2 minutes, you don’t want to thwart your effort thus far.
- Change your computer’s adapter settings back to Obtain Automatically (IP, Subnet, Gateway, DNS etc…) – you can do this while you are waiting your 2 minutes.
- If everything went well then your computer should obtain an IP automatically and you can now jump for joy, you have unbricked your router congrats.
- If this didn’t work then try power cycling the router, if that doesn’t work then I am sorry 🙁
These are the resources I used to figure all this out:
- http://www.dd-wrt.com/wiki/index.php/WL500G_Premium_v2#Flash_using_recovery_method
- http://zo0ok.com/techfindings/archives/9
- http://www.techrepublic.com/blog/networking/how-to-install-the-tomato-firmware-on-an-asus-router/3139
- http://support.asus.com/download.aspx?SLanguage=en&m=WL-500gP%20V2&p=11&s=2&os=30&hashedid=jTcQKIRXgNPLo54b