The Problem
I type a lot, I never counted the number of words per day and maybe I should, but it’s enough to have made the faux leather on my thirteen year old wired Logitech Wave keyboard start to tear. Stupidly, I didn’t take before pictures of the damage and I wish I did because the damage is extensive and would have been fun to share, but just take my word for it. However, I do have two of these keyboards so I will be showing the same wear pattern that happens after ten years. These keyboards are identical. I use one for work and one for my personal machine. I am sure I have raved about Logitech before and here I go again. Logitech produces the best Human Interface Devices (HID), I have bought nothing else my whole life. The Wave Keyboard is SO good, it has stood the test of time for 13 years and counting. I have had to grease the keys a little to give it back some spring on press, but that’s it.
Wired version is harder to find now
The wired version of this keyboard is harder to find now and I don’t know why. However, if I had to buy a new keyboard for work I would probably buy their wireless version K350. Although, for gaming, which I do a lot of I would only use wired. This is not an endorsement and Logitech doesn’t pay me for this, they just make excellent gear that stands the test of time.
The Solution
I searched high and low for a fix for this to no avail. So I did some research and weighed options on how to fix my keyboard’s faux leather tear. Here are the before and after pictures of the problem.

In the picture above, you can look at the wrist rest on the keyboard and see that there is definitive damage from ten years of use. Those super shiny spots on the wrist rest are not oil stains from where my palms rest, it is the beginnings of tears forming in the faux leather surface. This is exactly the same thing that happened on my thirteen year old keyboard before a small hole formed in the faux leather and then one day it just tore open to produce a flap.
Traditional faux leather repair
All of the information I was finding was pointing to two options:
- Soft leather filler – which is basically a resin/putty that you work into your damaged leather (faux, vinyl etc.). You work it in, let it dry, sand it, and reapply as needed. Then you have to color it to match your leather. A little bottle of this is in the upwards of like $25 and the hole in my keyboard wasn’t that bad that I needed to work with something like this.
- Adhesive leather patch – just like it sounds, this is a very thin layer of faux leather with a very strong adhesive backing. It comes in rectangles or a roll for about $8-15 depending on the dimensions you opt for.
- Dye/color kits – some things you find don’t repair anything, they are for coloring faded furniture leather, so be careful not to buy this if you are trying to fix a hole. This won’t fix anything and it is marketed incorrectly (on purpose?) from what I have seen.
You can watch videos on how this is done on YouTube, this is where I got my information from. Very helpful to make a decision.
Whatever let’s try it
At this point I could care less how this turned out because my keyboard is thirteen years old like I said and I wanted to see what I could do to fix it. The keyboard still works great by the way, I try to keep it clean by wiping it down with alcohol and removing debris however I can. I have removed keys with a key puller to grease keys and clean under them. Excellent build quality.
I am not saying I did a good job, because I didn’t. I actually didn’t think this would work as well as it did so I wasn’t trying to be careful or make it look nice. This was just an experiment as far as I was concerned. The repair exceeded my expectations.

As you can see I chose a color other than black because why not. I honestly don’t care if it matches. Here are the steps I followed to make this happen:
- Tear away all loose damaged leather. Try to only tear off as much as needed because you want the patch to sit on top of the existing leather for a good bond.
- Underneath the leather (not shown) is a type of grey foam which was completely stained and discolored with palm sweat and oil I assume? The foam was also damaged and deteriorating to dust. I swept away any loose particles.
- Very gently, sand with a high grit sand paper the foam. I used a 400 grit sand paper. This is to remove any loose pieces of foam and to create a cleaner bonding surface.
- Clean everything, including the foam, with rubbing alcohol. I used 90% rubbing alcohol with cosmetic makeup pads.
- Let it air dry, which should happen quickly because the alcohol will evaporate.
- Wipe away any lint with a clean paper towel and try to make it as lint free as possible.
- Measure the area and cut a strip of patch long enough to cover the damaged area so that it overlaps the hole and covers the existing leather.
- Peel the paper backing and apply as needed.
- For rounded corners, feel free to cut out a notch in the patch so that the leather can be folded underneath and you get a nice pull on the corner.
- Gently hold down the leather and make sure it is adhered.
- Let it sit over night so it has time to cure.
I really didn’t think this would work
I honestly didn’t think this would work, but it did. Had I known it would have worked this well I would have done a much better job at cutting the strips. I was making crooked, eyeballed, curved cuts because I didn’t care. I only covered the areas where my palms rested. However, next time for my ten year old keyboard which will also tear in an estimated three years, I will be far more careful and try to use the strip all the way across to fully replace the whole surface.
- The adhesive is very tacky and strong.
- The patch is very pliable and can be molded essentially to fit weird shapes and crevises
- It is very thin so it doesn’t impact the height of your palm
- You hardly know it is there while using it.
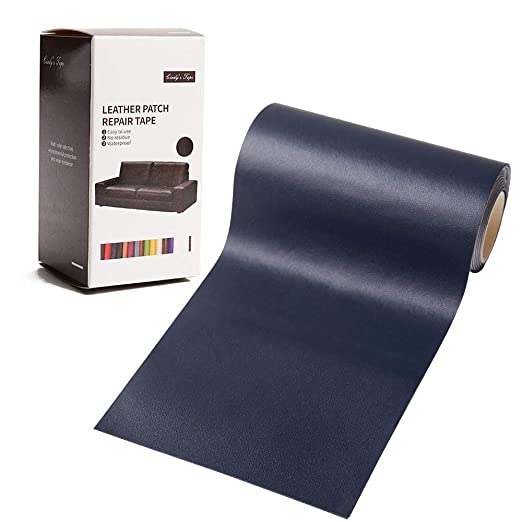
Over all I am very pleased with this. Here is the product I used, again not an endorsement, but it worked very well. I found it on Amazon:

| Listing name | Leather Repair Tape Patch kit Purplish Blue, 3X60 inch Multiple Colors Self Adhesive Patch for Couch,Sofa,Car Seat,Handbag,Furniture,Drivers Seat,Jacket, First Aid Vinyl Repair kit |
| Brand | Cindy’s Tape |
| Price | $9.96 |
Anyhow, I wanted to post this because I could find zero information on how to deal with this and I am not one to just throw something away because of something minor like this. I don’t mind repairing what I have when I can. Hope this helps anyone looking to do the same.
Update 10/29/2022
My 10 year old keyboard’s padding started to lift worse than what I showed several months ago above. The shiny spots got worse as expected so I attempted to avoid tearing off the existing faux leather. I regret this decision because it caused problems with the application of the leather patch. Therefore, I recommend always removing the affected/weakened areas before applying the patch.


The other thing I tried to do this time is apply the patch in one long strip instead of two strips. It had okay results, nothing great. I am not sure what’s better doing it in two parts or trying to apply one long strip. The main problem I ran into is to make the faux leather pliable, I had to remove the backing so I could bend it. The adhesive layer stuck to the affected surface when I didn’t want it to and it pulled up and broke a hole open in the affected spots. Hence why I think it’s a better idea to remove the bad spots, they will lift off easily. Either way, not a big deal to me.

Below the Windows key and the right ALT key I had to make cuts so I could bend the leather at an angle. On the right side since the original leather started to lift there is now a bubble that I cannot fix because the patch is affixed to the original leather. Not a big deal. I can always tear everything off and reapply later. I did a bad job of cutting out a trapezoidal shape so that the logo could be exposed. My scissors weren’t the sharpest so it kept bunching on the adhesive which is why there is a noticeable chunk missing at the top left of the trapezoid.
~$10 fixed two keyboards – that’s a win in my book.